
the kitchen table serves as a staple/compass for the kitchen. it’s a place where family gathers, shares, blesses food, cooks, cleans, and converses on life’s most intimate moments. And just like the kitchen table is the compass for the kitchen, the coffee table becomes a compass for the living room.
Coffee tables are where coaster housing and coffee mugs sit, tired feet from long hours of working relax, home decorating books and magazines are sorted, remote controls are stored, and picture frames of children, grandchildren, and other people that we love are treasured and viewed.
they come in all shapes, sizes, and colors. if you are dealing with a wood coffee table, you are dealing with all different grains of varieties of wood: acacia Wood, Pinewood, distressed wood, mahogany wood, cherry wood, etc.

But what makes a good coffee table? one That is simple, functional, and grace -filled for your lifestyle and identiry. only you know what all of that entails.
Early on in the pandemic, I decided that I wanted a coffee table for my family room/library/praise dance ministry room/podcast recording room/guest room. Yes, this room was a multi-purpose room with enough space to serve all of my needs.
I could not afford to purchase any of the coffee tables online. And thus, I decided to do what I always do when there is a need for a piece of furniture, and I don’t have the funds to get it – I pray about it.
then I try to figure out if the piece of furniture can be built with wood And plumbing pipe materials. I scouted out several different areas online to get an idea of how I would like my piece of furniture to look and serve me and my family, as well as any other people invited into my space.
After scouring several websites, including pinterest, and finally coming up with a design of my own, i enlisted the help of my son.
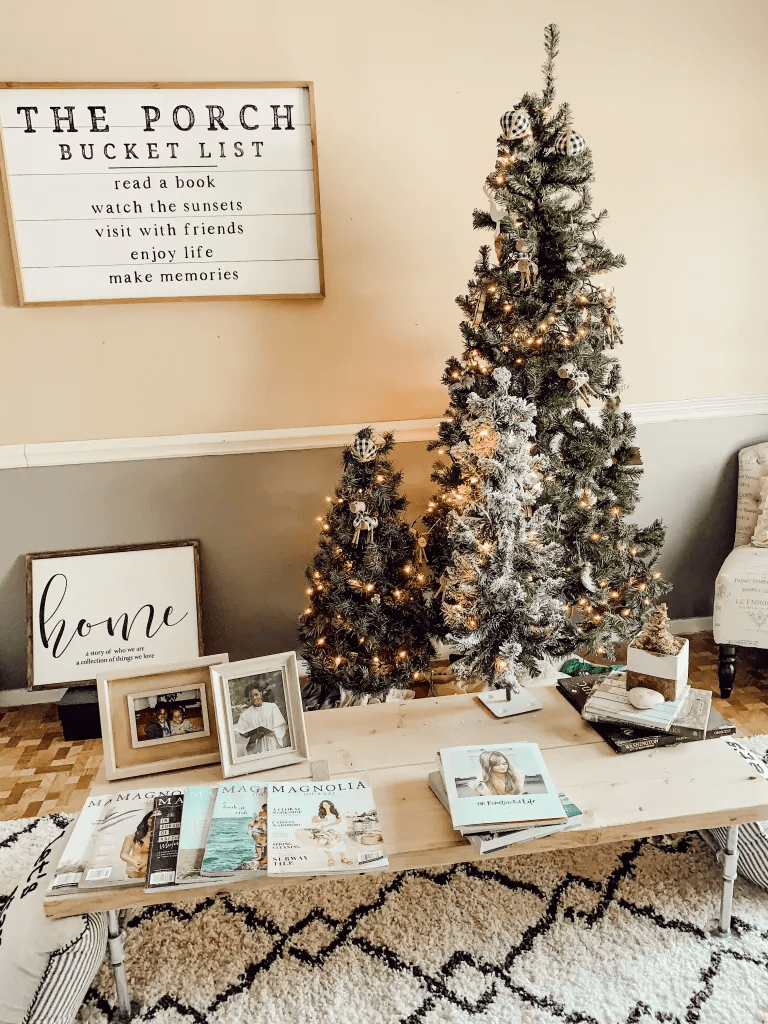
I was very excited with the end result. The coffee table helped to make the library look like a library. The natural wood helped to give the room more of an organic look. And lastly, the table is multi-functional in nature: it serves as a holder for magazines, books, frames, mugs, and a footrest.
There are a couple of tips that I would like to give you in regard to building this table (according to my son):
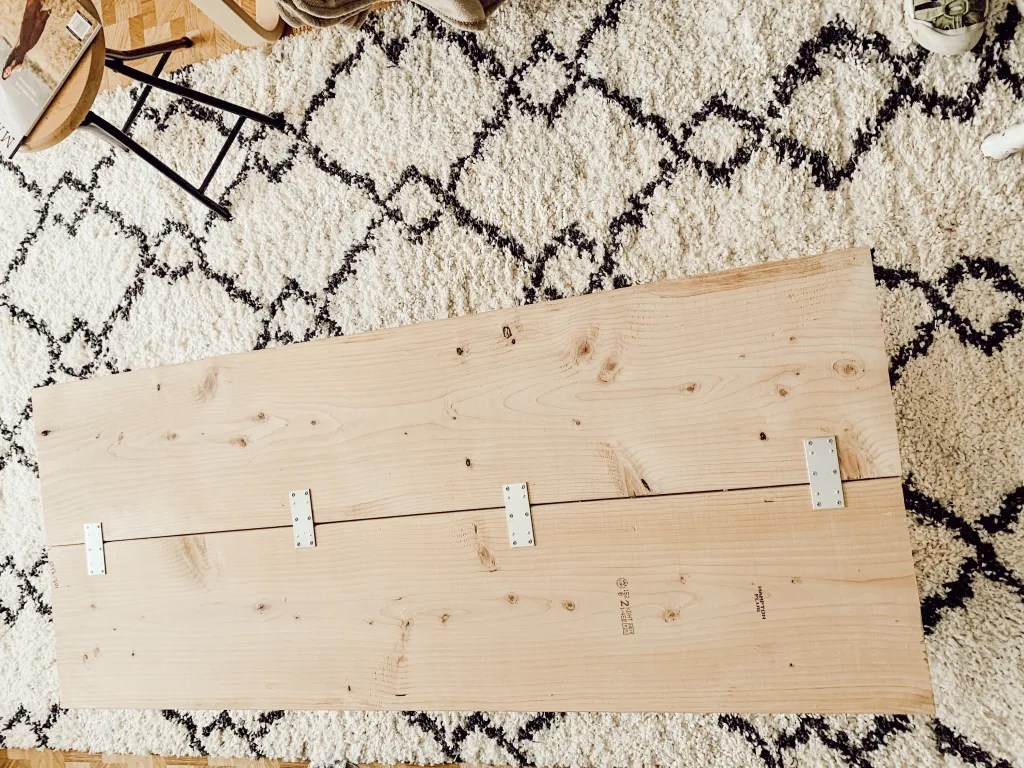
- The more mending braces used, the sturdier the table will be. (Especially if someone decides to sit on it.)
- You want to make sure that the two pieces of construction lumber are as straight as possible before you start drilling the holes into the wood.
- The flanges should be as flat and stable as possible before you start drilling into the wood.
- Be careful that the wood that you select isn’t too split, or the table won’t last. (I like the worn split look, but not too split.)
Tools:
- (8) 1/2″ galvanized pipe flanges
- 2 packs of National Hardware Mending Braces (4 braces are in each pack)
- (1) 1/2″ 48″ galvanized pipe nipple
- (8) 1/2″ 6″ galvanized pipe nipples
- (4) 1/2″ 5″ galvanized pipe nipples
- 1 dril
- 1 screwdriver
- (6) 1/2″ galvanized tees
- (2) 2″ x 12 ” wide X 60″ long pieces of construction lumber (this is what I should have done; instead I bought one long piece of construction lumber had them to cut it down to size; either one works. The second option give you leftover lumber for other projects.)
- (16) 1 1/2″ construction screws
execution
Make a letter H with the plumbing pipe materials on both sides, connecting the 1/2″ 48″ galvanized pipe in the middle, per the instructions and picture below.

Take a flange, screw in one 6″ pipe nipple, attach one tee, and then another pipe flange at the bottom.
Attach a 5″ nipple to the tee in the middle, followed by a tee, then another 5″ pipe nipple.
Make the right side of the “H”.
Take a flange, screw in one 6″ pipe nipple, attach one tee, and then another pipe flange at the bottom.
2. Attach the 1/2″ 48″ pipe nipple to the middle tee of the “H” on the left side.
Create the Right H following the same instructions above, and then attach to the 1/2″ 48″ pipe nipple in the middle.
3. Lay the two pieces of wood next to each other, making sure to attach enough mending brackets for stability, staggering on the top and bottom of the wood.
Turn your structure upside down, laying it on top of the top piece of the table, using 1 1/2 inch screws to attach the pipe flanges.
Unless the Lord builds the house,
those who build it labor in vain.
In whatever way you decide to design your coffee table, make sure that it fits you. That it declutters your memories, home, and life. And not only that, that it includes simple, functional, grace-filled living.
Reclaim your soul, space, and identity.
until next time,
katina

Leave a comment